Edit smarter, not harder. These 5 time-saving editing tips are perfect for creators who want pro results without the extra effort.
Editing can be time-consuming and exhausting, but what if I told you that there are simple tricks that can help you get maximum results with minimum effort?
Let’s jump straight into five editing tips that have helped me save hours without compromising the quality of my edits.
1. Adjustment Layers
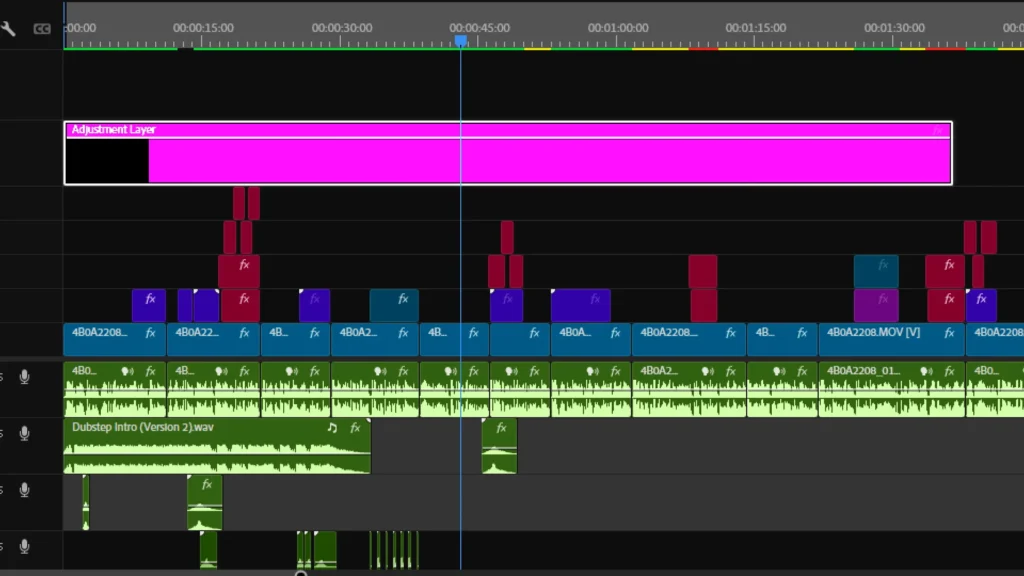
If there’s one feature in your editing software that can save you a ton of time, it’s Adjustment Layers. Think of them like transparent sheets you place over your timeline.
Any effect applied to an adjustment layer automatically affects all the clips beneath it. For example, instead of color grading every clip individually, just apply your grade to an adjustment layer and place it above all clips.
And it’s not just for color correction. You can use them for transitions, effects, even blurs or sharpening. This keeps your timeline clean, organized, and easy to tweak later.
2. Use Auto Features
Modern editing software is more powerful than ever, and it comes packed with tools designed to do the heavy lifting for you.
Take Premiere Pro for example. The Music Remix Tool lets you shorten or extend a music track without breaking its flow. The Color Match Tool can auto-match color between different clips. And my personal favorite Auto Ducking, it automatically lowers your background music when someone’s speaking, making dialogues clearer.
And now with Generative Extend, you can use AI to stretch video or audio clips without any noticeable loss in quality.
Want to go even further? Try FireCut AI, a third-party plugin that:
- Automatically cuts silent segments
- Removes filler and repetitive words
- Creates animated captions
- Even finds and adds relevant B-Roll to your timeline from the web
3. Keep Your Timeline Clean and Organized
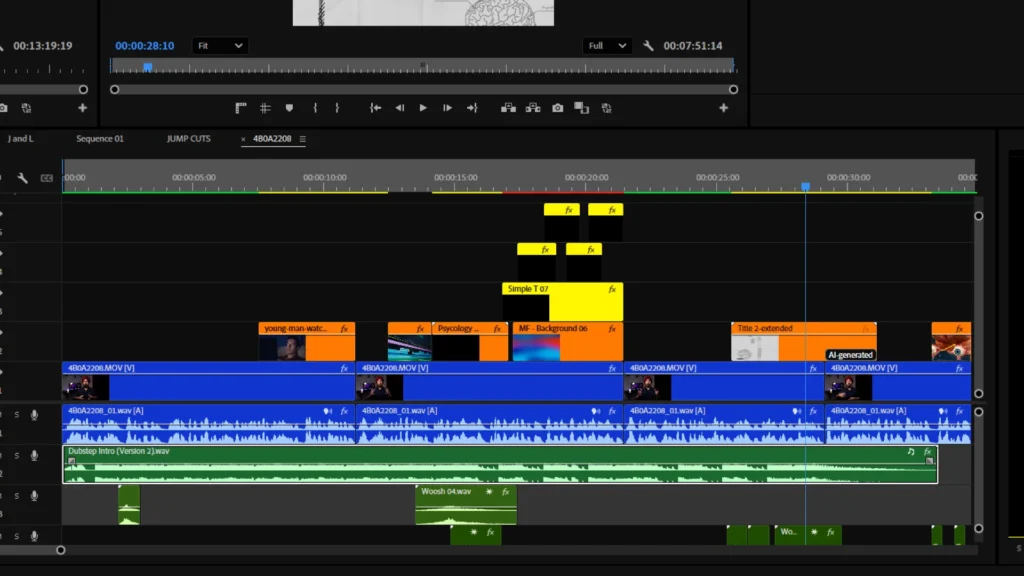
A cluttered timeline = a cluttered mind.
Keeping your timeline clean might not sound like a major productivity hack, but it’s a habit that saves time and sanity. Here are three quick tips:
- Color Label Your Clips: Main footage (Blue), B-Roll (Orange), Music (Green), Text/Titles (Yellow). One glance and you’ll know where everything is.
- Stack Smartly: Don’t dump everything on a single video or audio layer. Use dedicated layers for main footage, B-Rolls, effects, music, dialogue, and sound FX. It makes editing and troubleshooting much easier.
- Nest Complex Sections: If a part of your edit has too many layers, cuts, and transitions, nest it. That section becomes one single layer, keeping your main timeline neat and easier to navigate.
4. Subscribe To Envato
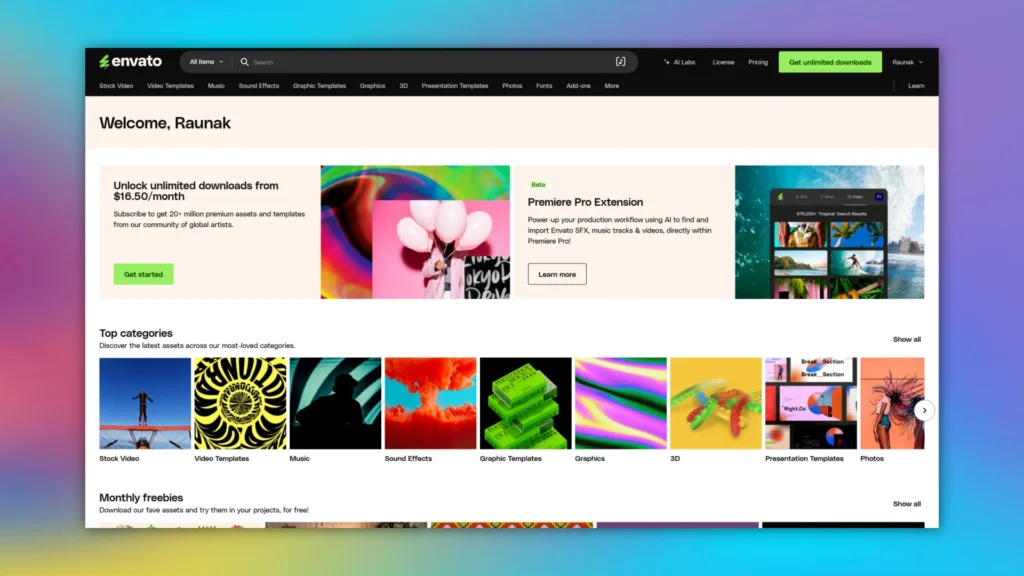
With attention spans shrinking, using motion graphics is a great way to keep viewers hooked. But let’s be real, not every editor is a motion designer.
This is where Envato comes in.
By subscribing to Envato, you get access to thousands of professionally designed motion graphics templates – for Premiere Pro, After Effects, and even DaVinci Resolve.
These templates are drag-and-drop ready and come with easy customization: change the colors, swap the text, adjust animation speed. No motion design knowledge needed.
I use these templates in almost every video I create, not because I’m lazy, but because they help me deliver polished results faster. Why spend an hour animating a title when someone’s already done it better?
Try it for yourself. I promise you’ll fall in love with it.
5. Use Proxy Files
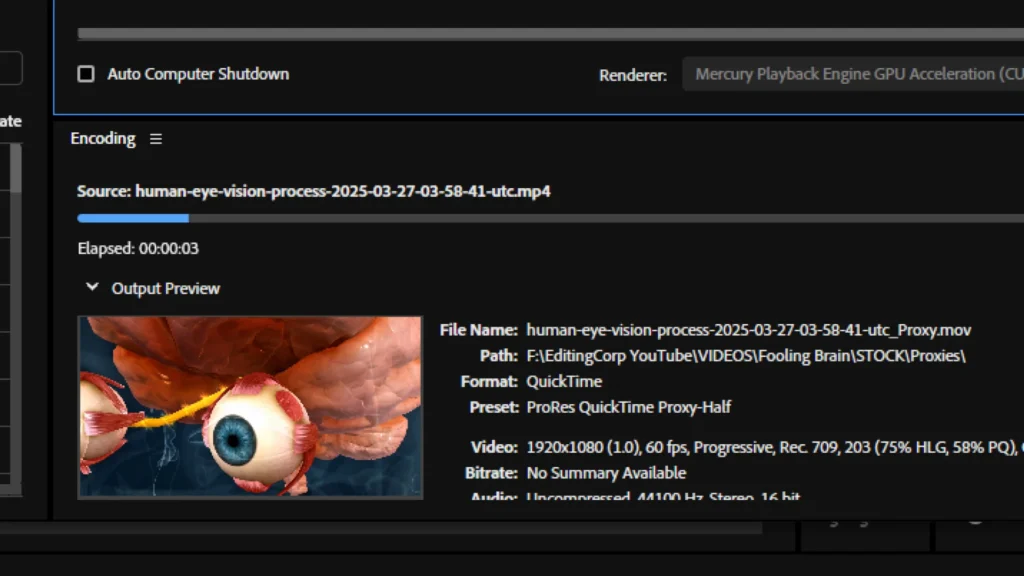
Editing high-resolution footage like 4K can be painful. Laggy playback, delayed scrubbing, and even unexpected crashes.
Here’s the solution: Use Proxy Files.
Proxy files are lower-resolution versions of your original footage, created specifically for editing. Once you’re done editing, your software automatically switches back to the original high-res files during export.
In simple terms: Edit in Low Resolution, Export in High Resolution.
Whether you’re using Premiere Pro or DaVinci Resolve, creating proxies is super simple. Right-click your media after importing and select “Create Proxies.”
Yes, it takes a few extra minutes in the beginning but it can save you hours later. Remember, struggling with crashes isn’t hard work, it’s just bad planning. Proxies help you edit better without trying harder.
Also, check-out: