Learn how to add animated text behind yourself using Premiere Pro and After Effects with this easy step-by-step tutorial.
Lately, a lot of people have been asking me how I add that cool animated text behind myself in my videos. Well, here’s exactly how you can do it too!
It’s simpler than it looks once you break it down step-by-step.
Step 1: Mark The Section In Premiere Pro

First, open your video in Premiere Pro and use the In and Out points to mark the section where you want the text to appear.
Once you’ve marked the section, export that portion of your video and import it into After Effects for the next steps.
Step 2: Cut Out Your Subject Using the Roto Brush Tool
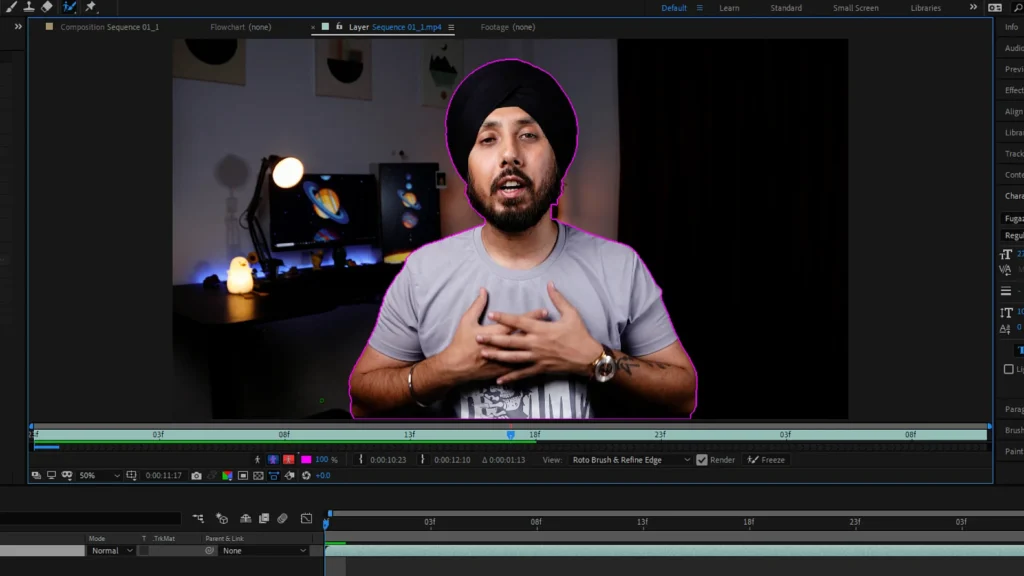
Inside After Effects, you’ll need to cut out (mask) yourself from the background. Here’s how:
- Select the Roto Brush Tool from the top toolbar.
- Double-click on your video layer to open it in the layer panel.
- Go to the start of your video and draw a rough selection around your subject.
- If you accidentally select something extra, just hold the ALT key and subtract those areas.
Once your subject is properly selected:
- Extend the Refine Edge Span to cover the full duration of your clip.
- Hit the spacebar to let After Effects automatically track and refine the mask frame by frame.
- Once it’s done, click Freeze to lock the mask in place.
At this point, your subject will be separated from the background, ready for text to be placed behind.
Step 3: Create And Animate Your Text
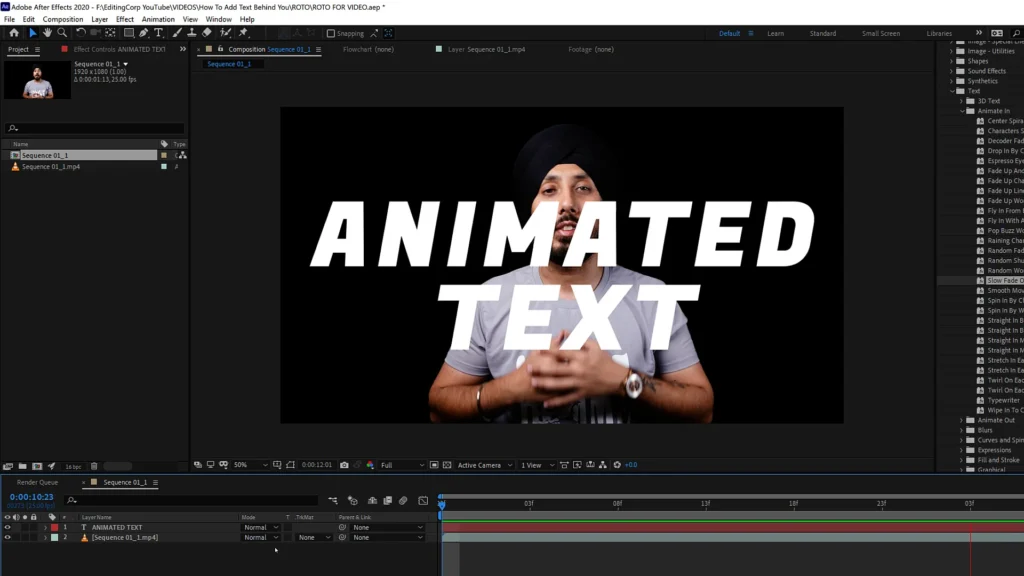
Now it’s time to add the animated text:
- Go to Layer > New > Text and type in your text.
- Open the Effects & Presets panel, go to Animation Presets > Text > Animate In, and choose a preset.
- I personally love using Slow Fade On – just drag and drop it onto your text layer.
If you want to adjust the animation speed:
- Select the text layer.
- Press the U key on your keyboard to reveal the keyframes.
- Move the second keyframe closer or farther to make the animation faster or slower.
Step 4: Place The Text Behind The Subject
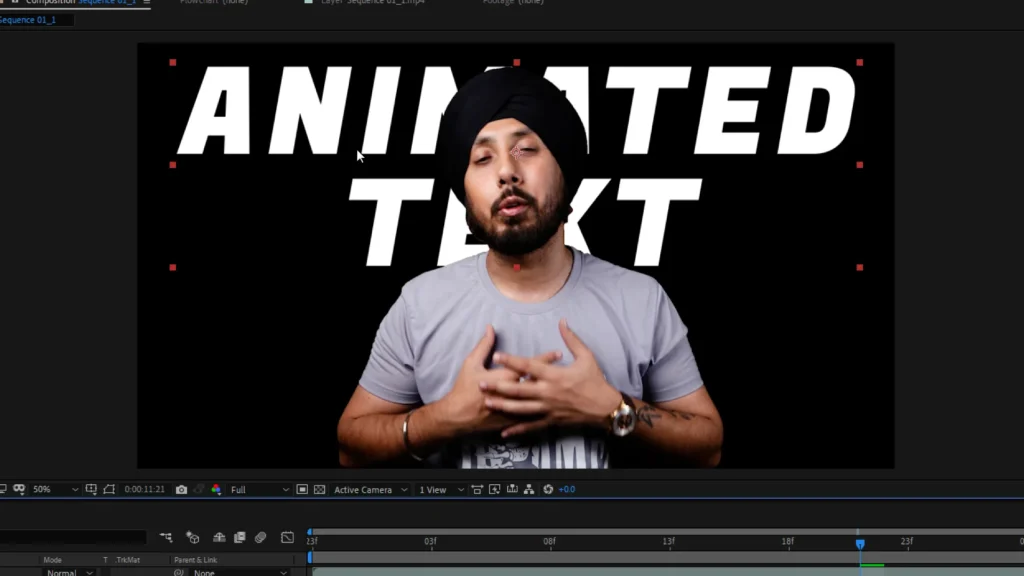
Once your text animation is ready:
- Move the text layer below the video layer in your timeline.
- Set the Track Matte option for the video layer to Alpha Inverted Matte.
This will push the text behind your masked-out subject, giving it that professional, layered look.
Step 5: Export The Final Clip
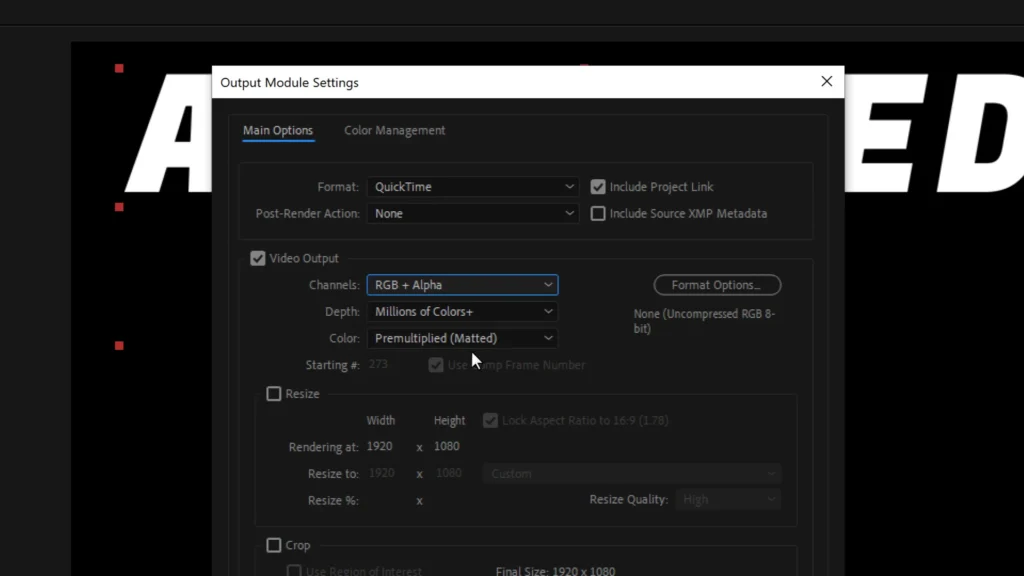
Now you’re ready to export your masked video with the animated text:
- Go to File > Export > Add to Render Queue.
- Click Lossless to open the Output Module settings.
- Set the Format to QuickTime and Channels to RGB + Alpha (this keeps the transparency intact).
- Finally, hit Render.
Step 6: Bring It Back To Premiere Pro

After exporting:
- Drag your rendered After Effects video back into Premiere Pro.
- Drop it exactly over the original section you had marked with In and Out points.
And that’s it! Now you have clean, professional-looking animated text appearing behind you in your videos.
Final Thoughts
It may sound complicated at first, but once you do it a couple of times, it becomes super easy – and the final result looks amazing. Give it a try and make your videos stand out!
Also, check-out: