
Transform yourself or your friends into Iron Man with our Free Iron Man HUD Template for After Effects & PhotoShop.
Have you ever watched an Iron Man movie and wished that, just for a moment, you could be enveloped in that iconic Heads-Up Display (HUD) – the one where you see the world through Tony Stark’s eyes? Well, now you can, and you don’t have to be a genius billionaire philanthropist to do it.
For those of us who aren’t equipped with a state-of-the-art AI like Jarvis or Friday, there’s a simple solution to get a taste of the Iron Man experience. All you need is a rudimentary understanding of Adobe Photoshop or After Effects, and our special gift to you – The Iron Man HUD Template.
The best part? It’s free!
The transformation is swift and straightforward. Within minutes, using this template, you can either step into Iron Man’s shoes or give your friends a shocking surprise by turning them into the Marvel superhero.
Wondering how it looks? Take a peek at the image below, showcasing how one user deployed the template and left his friend in sheer awe by converting him into the legendary Iron Man.
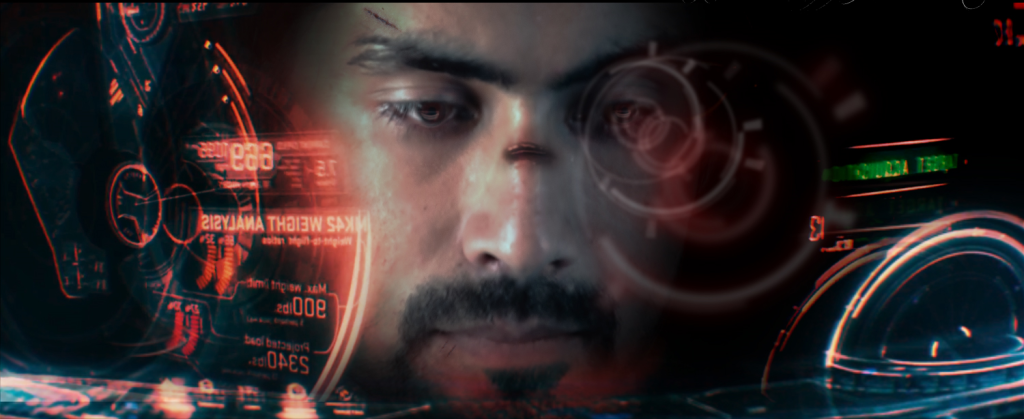
How Does It Work?
The Iron Man HUD Template is elegantly crafted as a PNG image. It is embedded with the detailed interface and dynamic displays Tony Stark interacts with, complemented by partial transparency to merge seamlessly with your picture.
The process to create your Iron Man visage is as simple as 1-2-3:
- Capture: Take a clear portrait of yourself or your friend. Ensure that the face is visible without any obstructions.
- Mask: Mask the face appropriately to ensure there are no rough edges.
- Overlay: Finally, position the PNG HUD template over your portrait. The partial transparency ensures that while the HUD elements are prominent, your facial features are discernible, giving it the genuine Iron Man feel.
How To Use The Iron Man HUD Template In After Effects
Create a new composition and import both the Iron Man HUD Template and the portrait photograph you wish to use with this template. Ensure you place the portrait below the Iron Man HUD Template.

Adjust the Face Layer by rotating and scaling it slightly. Ensure that the right eye aligns with the eye piece of the HUD.

Now, create a mask around the face, as we only need the center of the face, not the background. To achieve this, use the Pen tool and create a mask on the Face layer, as depicted in the image below. Ensure that you apply the mask to the Face layer only, not the Template layer.

Now, click on the face layer to select it and press ‘F’ on your keyboard. This will display the Mask Feather options. Feather the mask slightly to eliminate sharp edges.

Now, we need to create a black background. To do that, go to Layer > New > Solid and create a black solid. Ensure it’s set to comp size and place the black solid layer beneath all the other layers, as shown below.
This will establish a black background for your image.

You can also perform some basic color correction on the face layer. Go to Effect > Color Correction > Curves, and add the curves adjustment. Adjust it to your preference.
Additionally, you can use the Hue/Saturation filter to either saturate or desaturate the face layer. Navigate to Effect > Color Correction > Hue/Saturation and adjust the Master Saturation as needed.

Now that we have our final image, you can continue experimenting until you are completely satisfied with your work, and then render it out.
Photoshop version
It will work with almost every version of Photoshop.